Verifying DNA matches across multiple databases ensures your research is accurate and reliable. Each testing platform uses unique algorithms, so cross-referencing results is essential. Here’s how you can do it:
- Prepare Your DNA Data: Download raw DNA data from platforms like AncestryDNA, 23andMe, MyHeritage, or FamilyTreeDNA. Ensure the file is formatted correctly (e.g., 23andMe format) and securely stored.
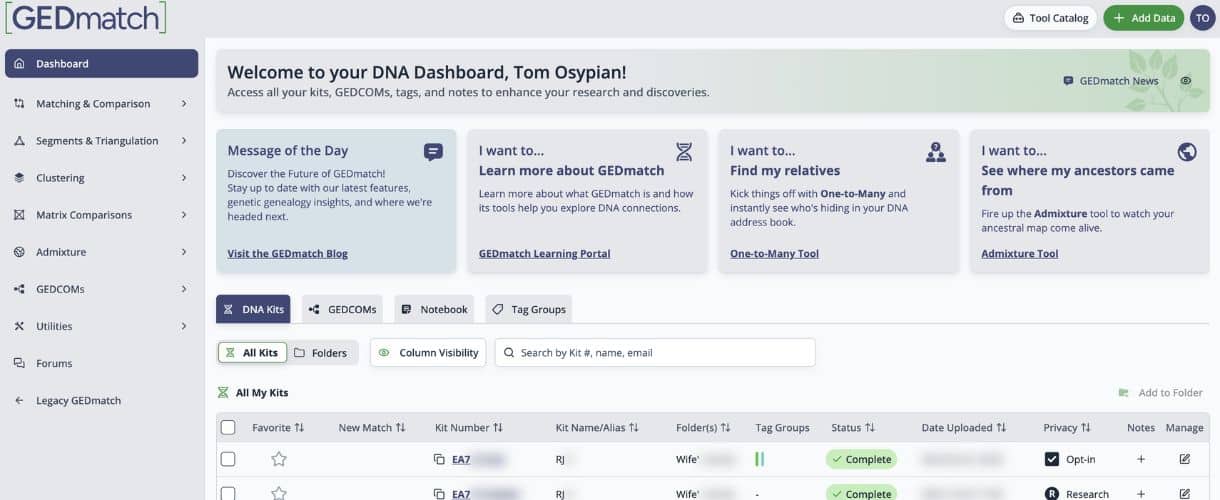
- Upload to GEDmatch: GEDmatch allows you to compare DNA data across platforms. Upload your file, and use tools like One-to-Many comparisons, Segment Search, and Clustering Kits to analyze matches.
- Analyze Key Metrics: Focus on shared centimorgans (cM), number of segments, and largest segment size to assess relationships. For example, parent-child matches share 3,400-3,700 cM.
- Use Triangulation: Confirm relationships by identifying shared DNA segments among three or more individuals. GEDmatch’s Triangulation tool helps pinpoint overlapping segments.
- Document Everything: Keep detailed records of kit numbers, shared DNA, segment data, and potential relationships. Use spreadsheets to organize and prioritize matches.
How To Determine Relationships With DNA

Preparing Your DNA Data for Cross-Database Analysis
To get the most out of GEDmatch’s analysis tools, you’ll need to properly download, format, and upload your DNA data. Here’s how to get started:
Downloading Raw DNA Data
Raw DNA data comes as a text (.txt) or CSV file and is often compressed in a zip or gz archive. These files include key details like RSIDs, chromosome numbers, positions, and allele values. Before uploading to GEDmatch, make sure the file is formatted correctly.
Here’s how to download your raw DNA data from major providers:
- AncestryDNA
- Log into your Ancestry.com account.
- Navigate to "Your Results Summary" under the DNA menu.
- Click the gear icon, select "Download DNA Data", and verify your account.
- Use the link sent to your email to download the file. Check the provider’s instructions for specific timing.
- FamilyTreeDNA
- Sign into your FamilyTreeDNA account.
- Go to the "Results and Tools" section on your dashboard.
- Select “Autosomal DNA.”
- Finally, click “Download Raw DNA data.”
- MyHeritage
- Log into your MyHeritage account.
- Hover over the DNA tab and select "Manage DNA Kits."
- Click the three dots next to your kit, choose "Download kit", and accept the terms.
- Use the email link to download your raw data. Note that raw DNA files are only available if you’ve taken a MyHeritage DNA test.
- 23andMe
- Visit 23andMe’s data download page.
- Go to “Settings,” then “23andMe Data.”
- Select “Download Raw Data.”
Once formatted, organize your files for easy access. Create a specific folder for your DNA data and use a clear naming system – for example, include the testing company, your name or kit number, and the download date. If your file is compressed, ensure it’s unzipped or re-compressed appropriately before uploading.
Uploading to GEDmatch
Now that your data is ready, head over to GEDmatch to upload it. Fill out the upload form, including the name of your testing company. Once uploaded, GEDmatch will assign a unique kit number to your file, which you’ll need for future analyses. Processing typically takes 24–48 hours.
GEDmatch offers free and premium tools for analyzing your data, such as One-to-Many comparisons, Segment Search, and Clustering Kits. Keep track of your kit numbers and upload dates for reference.
Lastly, remember to store secure backups of your DNA files. These files contain sensitive genetic information, so treat them with the same care as any personal health data.
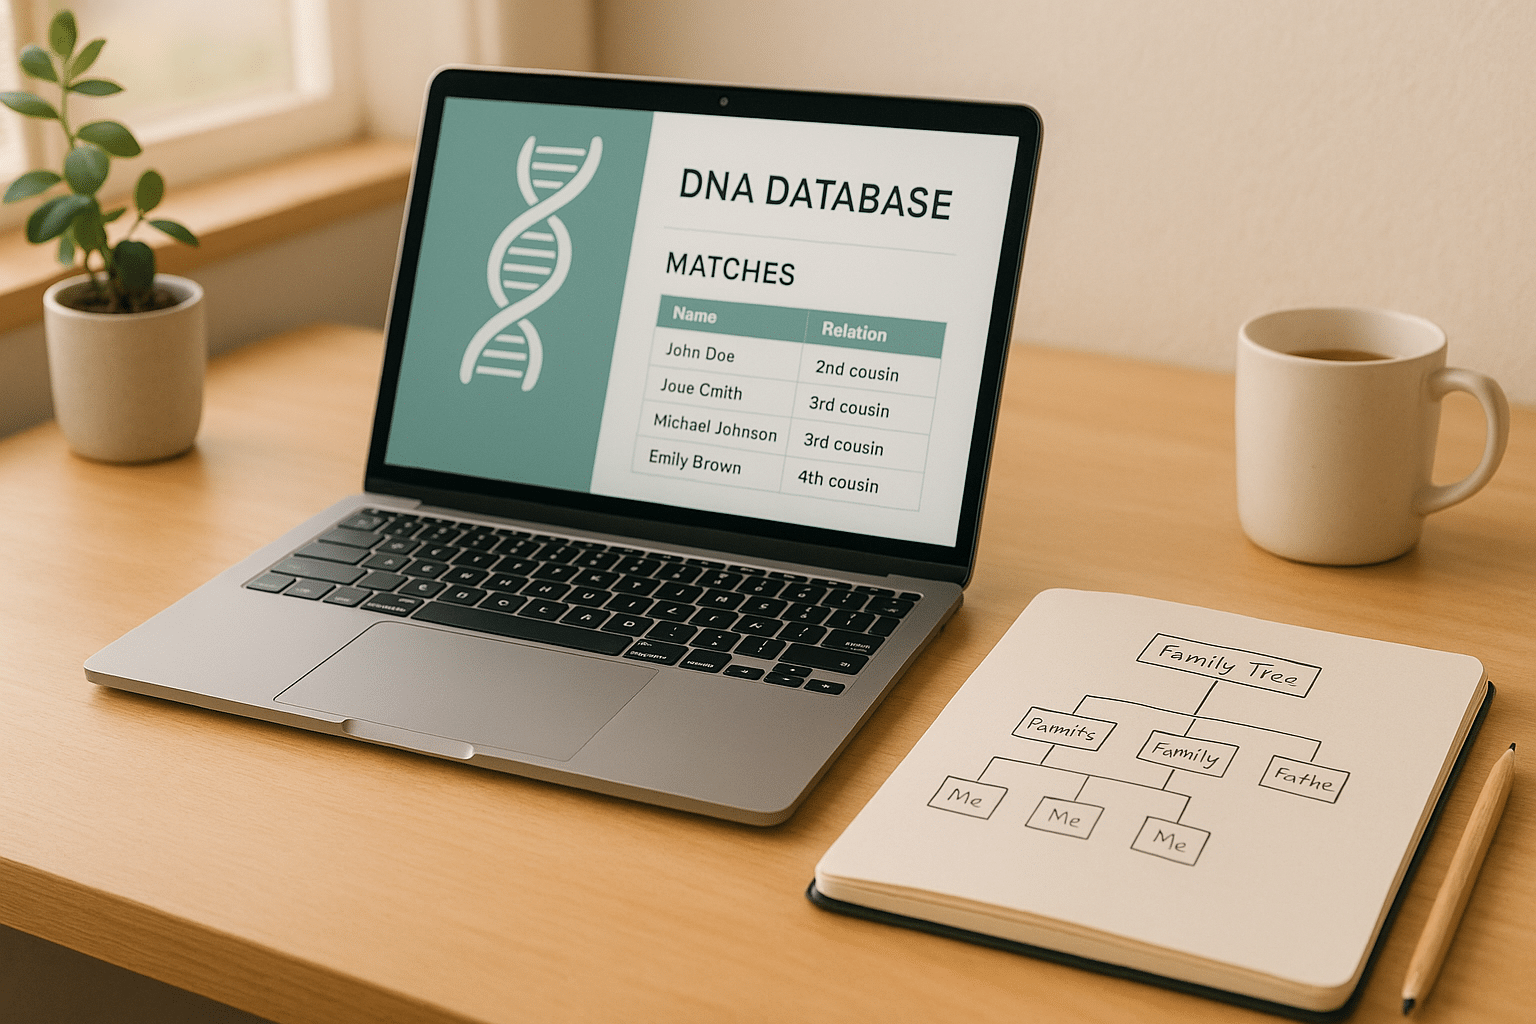
Finding and Analyzing DNA Matches
Once your DNA data is processed on GEDmatch, you can begin identifying and analyzing matches to confirm relationships. This process involves carefully tracking key metrics and using analysis tools effectively to ensure accuracy. These steps lay the groundwork for deeper investigations, like triangulation and relationship verification.
Key Metrics to Track
When reviewing DNA matches, focus on three main measurements: total shared centimorgans (cM), number of segments, and largest segment size.
- Shared centimorgans (cM): This measures the total amount of DNA you share with a match and is the primary indicator of how closely related you are. For example:
- Parent-child relationships typically show 3,400-3,700 cM.
- First cousins share around 680-1,150 cM.
- Second cousins share between 75-360 cM.
- Number of segments: This tells you how many separate pieces of DNA you share. While more segments often suggest a closer relationship, this metric is most meaningful when paired with total cM. For instance, 100 cM spread across 20 small segments suggests a distant connection, while 100 cM across 3 large segments hints at a closer relationship.
- Largest segment size: This helps verify the validity of a match. Close relatives typically share at least one segment over 15 cM. Matches with only small segments (under 7 cM) might indicate distant connections or statistical noise. Always record the size of the largest shared segment for significant matches.
Leveraging GEDmatch Tools
GEDmatch offers several tools to help you analyze your DNA matches. Here’s how to use them effectively:
- One-to-Many Comparison: This tool is your starting point. It lists all matches sharing over 7 cM, along with their total shared DNA and largest segment. Run this tool frequently, as new matches are added as more users upload their data.
- One-to-One Autosomal DNA Comparison: Use this tool to dive deeper into specific matches. It provides a chromosome-by-chromosome breakdown, offering detailed segment information. This is especially useful for matches over 20 cM or when preparing for triangulation.
- Segment Search: This premium tool identifies others who share the same DNA segments as you and a known match. By entering a chromosome, start and end positions, and a minimum cM threshold, you can find overlapping matches in that region. This is essential for triangulating relationships.
- Clustering Kits: This tool groups matches based on shared DNA patterns, helping you identify family lines. Matches in the same cluster often descend from the same ancestral couple. It works best for matches between 20-200 cM and can uncover family groupings you might otherwise overlook.
By systematically using these tools, you can build a clearer picture of your family tree.
Keeping Detailed Records
Accurate documentation is key to validating your findings and guiding further research. Use a master spreadsheet to log essential details, including:
- Kit number: The unique identifier for each match.
- Total cM: The total amount of shared DNA.
- Segment count: The number of shared DNA segments.
- Largest segment: The size of the largest shared segment.
- Relationship estimate: Your best guess at how you’re related.
Add additional columns for:
- Match origin: The testing company they initially used.
- Contact status: Whether you’ve reached out to them.
- Response received: Whether they’ve replied to your outreach.
Direct communication with matches can often lead to breakthroughs, so tracking your outreach efforts prevents duplicate contacts and helps you follow up effectively.
Include a notes section for each match, where you can jot down relevant details like family surnames, geographic locations, or specific ancestors they’re researching. This information can be invaluable when tracing common ancestral lines or confirming suspected relationships.
For matches over 50 cM, create segment maps to track which chromosomes and positions you share. Copy these details into your records, as they’re crucial for triangulation.
Consider organizing your spreadsheet into separate worksheets for different relationship categories (e.g., immediate family, first cousins, second cousins). This makes it easier to focus on the most relevant matches for specific research goals and helps you prioritize your efforts.
Lastly, keep track of analysis dates and tool versions used. GEDmatch occasionally updates its tools and algorithms, so this information ensures you’re working with the most current data and helps you decide when to revisit previous analyses.
Confirming Relationships Through Triangulation
Triangulation is one of the most reliable methods for confirming DNA relationships and uncovering shared ancestry. It goes beyond basic match comparisons by proving that three or more individuals share identical DNA segments inherited from a common ancestor. When used correctly, triangulation provides strong evidence of genetic connections and helps rule out misleading matches.
What is Triangulation
Triangulation happens when three or more individuals share the exact same DNA segment on the same chromosome at identical positions. This shared segment must originate from a mutual ancestor, making it a powerful tool for confirming genetic relationships. Imagine a triangle where the shared DNA segment ties all participants to a common lineage.
For triangulation to hold up, certain criteria must be met. The shared segment should be at least 7 centimorgans (cM) to avoid random matches, though many researchers prefer segments over 10 cM for added confidence. If there’s any gap in the shared region, the triangulation is invalid.
True triangulation requires all participants to share DNA with one another, not just with you. For example, if Person A shares a segment with you and Person B shares a different segment with you, but Persons A and B don’t share DNA with each other, this isn’t triangulation. This distinction is critical because it separates genuine ancestral connections from coincidental overlaps.
The real strength of triangulation lies in its ability to group matches by ancestral lines. When multiple matches triangulate on the same segment, they’re likely descendants of the same ancestral couple. This helps you organize DNA matches into family groups and focus your research on specific branches of your family tree.
To verify these overlaps, tools like GEDmatch’s chromosome browser come in handy.
Using Chromosome Browsers
GEDmatch offers chromosome browser tools that are essential for conducting triangulation analysis. The One-to-One Autosomal DNA Comparison tool is particularly useful, as it reveals exactly where you share DNA with a match, breaking it down chromosome by chromosome with precise start and end positions.
Start by selecting a match with a total shared DNA of over 20 cM and run the One-to-One comparison. The results will show each shared segment, including its chromosome number, start and end positions, and size in centimorgans. Record the details for segments over 10 cM, as these are key for triangulation testing.
The Segment Search tool is another vital resource. Enter the chromosome number, start, and end positions from your match data to pinpoint others in the database who share DNA in the same region. This minimizes the risk of false positives.
The Chromosome Browser visualization allows you to see overlapping segments in a graphical format. When comparing multiple matches, look for segments that align perfectly on the same chromosome positions. These visual overlaps often signal triangulation opportunities worth exploring further.
Once you’ve gathered your segment data, it’s time to cross-check it for confirmed triangulation.
Cross-Checking Segment Data
Cross-checking ensures that your triangulation results are accurate and reflect genuine shared ancestry. Consistent segment data across multiple comparisons strengthens the validity of your findings. After identifying potential triangulation groups using the Segment Search tool, use the One-to-One comparison to verify that all participants share overlapping segments.
Pay close attention to segment boundaries. While true triangulation requires overlapping DNA, slight variations in start and end positions are normal due to recombination patterns. For example, a segment ranging from positions 45,000,000 to 65,000,000 can still triangulate with another segment from 47,000,000 to 63,000,000 if there’s enough overlap.
Determine the precise overlapping region for each group. If three matches share segments that overlap from positions 50,000,000 to 60,000,000, this 10-million-base-pair region represents your triangulated segment. Convert this overlap into centimorgans to assess the strength of the evidence.
Whenever possible, cross-reference family tree information. Triangulated matches should also show genealogical connections that align with their genetic relationship. For instance, if three matches triangulate on chromosome 12 and all have ancestors from the same region or share a common surname, this bolsters the credibility of your findings.
Stay organized by tracking triangulation groups in spreadsheets. Include columns for chromosome number, start and end positions, segment size, and participant kit numbers. Add notes on potential common ancestors or family lines. This structured approach helps you identify patterns and focus your research on promising leads.
Lastly, regularly revisit your triangulation groups. As new users join GEDmatch, additional matches may appear within your established groups. Re-run the Segment Search tool on your strongest triangulated segments to uncover new family connections and deepen your understanding of each ancestral line.
sbb-itb-65d4ad3
Reading and Troubleshooting DNA Match Results
Once you’ve completed triangulation, the next step is to interpret your DNA match data and address any discrepancies. DNA matching can be tricky, but knowing how to categorize results and troubleshoot issues can make your family tree more accurate and reliable.
Categorizing Match Results
Organizing DNA matches into categories helps prioritize your research and gauge how confident you can be about certain relationships.
- Confirmed matches: These are the most reliable connections, such as immediate family members. They should consistently appear in match lists across all major DNA testing platforms.
- Probable matches: These relationships generally fall within expected shared DNA ranges but may lack full triangulation or complete genealogical evidence.
- Questionable matches: These require further investigation. They often involve distant relatives where shared DNA is close to detection thresholds or where supporting records are missing.
For each category, compare shared DNA against established thresholds to validate the connections.
Fixing Mismatches
After sorting your matches, you may encounter inconsistencies between your expectations and the results. A mismatch with a known relative can be frustrating, but careful troubleshooting often reveals the cause. Always double-check your data before jumping to conclusions.
Start by confirming the reported relationship. Misclassifications are common – a second cousin might actually be a second cousin once removed or even a third cousin. Tools like DNA Painter can help clarify shared DNA ranges and expected relationships.
By systematically addressing mismatches, you can improve the accuracy of your cross-database comparisons.
Staying Updated with Tools and Data
Once you’ve resolved any mismatches, it’s essential to keep up with changes in DNA tools and databases. GEDmatch, for example, frequently updates its algorithms and features, which can impact your analysis. Revisiting your comparisons every six months ensures you benefit from new tools and expanded databases.
Regularly monitor triangulated groups, as new uploads to GEDmatch can reveal additional matches that may strengthen or expand your ancestral connections. Stay informed about updates by checking GEDmatch’s user forums and help documentation.
Finally, combine your DNA findings with genealogical records for a more robust understanding of your family history. With ongoing updates and careful analysis, your research will continue to evolve and improve.
Conclusion: Key Steps for Verifying DNA Matches
Verifying DNA matches across databases involves careful preparation, thorough analysis, and leveraging the right tools. Start by downloading your raw DNA data, ensuring it’s properly formatted, and uploading it to GEDmatch. This platform offers powerful comparison tools to help you analyze your genetic connections effectively.
Accurate results depend on how well your data is prepared. Poorly formatted files or disorganized records can lead to incomplete or misleading outcomes, no matter how advanced the tools you use. Take time to understand GEDmatch’s features and tools to get the most out of your analysis.
Using triangulation is a tried-and-true method for confirming DNA relationships. By employing chromosome browsers to identify shared segments among relatives, you can distinguish genuine genetic links from random overlaps. This technique strengthens your verification process when paired with well-organized data.
Revisiting your analysis regularly is also essential. As GEDmatch’s database grows with new contributions, revisiting your comparisons can uncover new matches and provide deeper insights into your family connections.
To achieve the most thorough verification, combine your DNA findings with traditional genealogical records. This approach ties genetic evidence to documented family history, creating a more complete picture of your ancestry.
FAQs
How do I make sure my raw DNA data is properly formatted before uploading it to GEDmatch?
To get your raw DNA data ready for GEDmatch, make sure it’s saved as a .txt or .csv file and contains essential details like RSID, chromosome, position, and genotype information. Additionally, the file should match the Build 37 concatenated raw data format, as this is what GEDmatch supports. Don’t worry. These settings should occur by default.
Before uploading, double-check that the file adheres to your DNA testing company’s formatting standards. This step helps prevent upload errors and ensures everything runs smoothly on GEDmatch.
What should I focus on when analyzing DNA matches, and why does it matter?
When diving into DNA matches, two critical metrics stand out: shared centimorgans (cM) and the number of shared segments. These figures give you a snapshot of how much DNA you share with a match and offer clues about how closely you’re related.
The shared cM value reflects the total amount of DNA you have in common, while the number and length of shared segments provide additional context about the relationship. Generally, a higher cM count suggests a closer connection – think parent-child or siblings – whereas lower values often indicate more distant relatives. By understanding these metrics, you can better prioritize your research and uncover shared ancestry more effectively.
What is triangulation in genetic genealogy, and how can it help confirm shared ancestry?
Triangulation is a method used in genetic genealogy to confirm shared ancestry by pinpointing overlapping DNA segments between you and at least two other matches. When all three of you share the same DNA segment, it’s a strong indicator that you likely share a common ancestor.
To make triangulation work, you’ll need tools that allow for detailed DNA segment comparisons. One popular option is GEDmatch, a platform where you can upload your DNA data, analyze shared segments, and map out connections. With tools like this, you can deepen your genealogical research and uncover meaningful family relationships.